Thursday, January 26, 2012

Want to Read Along?

Hi friends, how about a virtual book club?  I love to read, and have three books that I'm enjoying right now.  If you are interested, you can read along with me....

Choosing to SEE by Mary Beth Chapman


Wow, this is a good book.  I've already read 169 pages in two days!  Some parts are tough- really tough to read- other parts have had me laughing out loud.  Mary Beth is the mom of six children, so all moms will relate to some part of her story.  She's adopted three daughters from China.  (We adopted our daughter from China a year ago, so I've greatly enjoyed the stories about China.)  Mary Beth also shares candidly about her struggles with depression, self-image, and dealing with grief and the loss of her youngest daughter.  She is married to the well known Christian musician Steven Curtis Chapman and shares interesting stories about their life together.  This book is ultimately a message of hope and points the reader to God who holds the whole world, and each of our stories, in His hands.  I think you'll enjoy it.

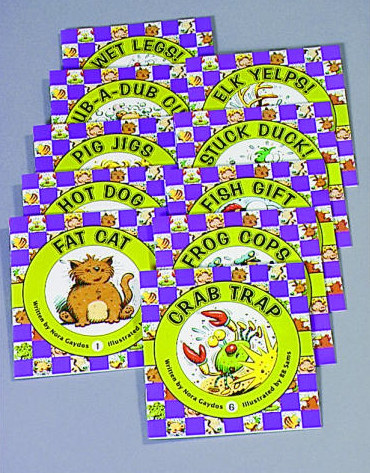
The Read-Aloud Handbook by Jim Trelease


I originally purchased this book for the recommended reading book lists in the back.  Once I cracked the book open though, I got sucked into all the interesting facts and findings about what causes some students to succeed and others to fail.  (Surprise!  The common denominator for successful students is that they were read to on a regular basis.  Thus, the reason for the book.)  Mr. Trelease gives lots of facts, details, and anecdotes to prove his point.  It's not a dry book at all as he shares personal tidbits often to keep it real.  He also gives some great recommendations of how to read to your kids at each age level.   But, he is so passionate about his subject that sometimes I feel like he being alarmist, or ranting a bit.  I don't agree with his feelings that the government should shame and bully parents into reading to their kids.  To me, that's extreme and not the way to go about things.  I have only read two of the nine chapters in this book, so I'm not sure if my opinion on the author's tone will change or stay the same.  All in all, I've already learned a lot from this book, and I've found the research and study results fascinating.  This is probably because I'm a teacher and helping kids learn- especially learn to READ- is one of my passions.  This book will not appeal to all moms, but it's worth checking out at the library to get some good read aloud suggestions.  The books are organized according to age groups so it's easy to find a section that would be applicable to your children. 


This is a devotional study on the names of God.  I am really excited to embark on the journey of getting to know God better.  A friend of mine recommended this book to me, and already after one day into it (I'm on page eleven)...I'm recommending it to you!  I've always loved mysteries and as a girl I spent my summers reading Nancy Drew books.  So, I'm realizing that I'm excited about this book partly because God is a mystery to me in many ways.  I want to know Him better.  Each section of this book is peeling away a bit of the mystery and revealing more of the truth about our Maker.  Another reason why I bought this book is because being a mom has showed me on a whole new level how much I need God's help.  He has all the answers, and I definitely don't!  Also, I want my kids to know God and find comfort and hope in Him too.  The better I know Him, the better I can parent them and teach them about their Heavenly Father.  Finally, this book is very encouraging.  It's full of truth and life because it's filled with scripture.  This book is like eating cheesecake- I take a bite and then savor it.  I read a bit and then mull it over and ponder the truth for a while.  Soon I find myself hungry for more and jump back in for another bite.  Oh, it's so good...life to my soul!  Why not join me in this Bible study?  


Friday, January 20, 2012

Handmade Thank You Cards

Back in November, I posted about painting with veggies.  We started out using celery, apples, and carrots to put paint to paper, but we ended up finger painting and making painted handprints too.  Messy fun!  Anyway, I tucked away the kids' painted 12x12 papers with thoughts of somehow turning their artwork into a keepsake.  Then December rolled in and we got swept up in advent calendar activities and prepping for Christmas company.  Once life settled down at the end of December, I thought about making thank you cards with the kids so they could thank family and friends for their Christmas gifts.  That's when I remembered the veggie paintings, and an idea for a quick card making craft was born.  


I trimmed the 12x12 pages into 4"x 5 1/4" rectangles.  Then I adhered the painted rectangles with double stick 3-D foam to 4 1/4 x 5 1/2" cards.  To finish the look, I stamped "thanks so much" in black ink.  To give added dimension, I also stamped "thanks so much" to a coordinating colored cardstock and punched it out.  I adhered the punched out phrase with more 3-D foam, and stood back to admire the finished product.  In a short time, I had 12 handmade cards- each one unique.  

When it was time to actually write out the thank you's, I interviewed my son about his gifts and wrote his own words in each card.  Some of his descriptions were hilarious! (Lil sis is too small for much commentary yet.)  I enjoyed getting feedback from the recipients of the hand painted cards.  My sister was inspired by our little project and sent us a thank you card with my niece's handprint on it.  I'm definitely keeping that card!

Tuesday, January 17, 2012

Recipe: Snickerdoodle Muffins

Snickerdoodle Muffins, they are worth every single calorie!!!

One of my bloggy friends, Ana, posted a recipe for Snickerdoodle muffins on her Life's a Beach blog.  Her photos made the muffins look absolutely delicious, and I was eager to taste them.  I printed out the recipe, but never made them until now.  We've had snow for the past three days with more on the way.  Snow always puts me in the mood to bake something sweet and yummy.  Today seemed like the perfect time to try out the new recipe...with the slippery roads we certainly aren't going anywhere.  Oh my goodness, these muffins are good.  Thanks, Ana, for the fabulous recipe!  (I'll be working off the calories by pulling my kids up the hill in their sled.)

Snickerdoodle Muffins

2 sticks butter, room temperature
1 cup sugar
2 tsp vanilla
2 eggs, room temperature
2 1/4 cups all purpose flour
3/4 tsp baking powder
3/4 tsp baking soda
3/4 tsp cream of tartar 
3/4 tsp ground nutmeg
1 1/4cup sour cream
1/2 cup of sugar with 1 tbsp cinnamon mixed in...set this mix in a small bowl and set aside.

Preheat oven to 350F and grease muffin tin(s).  

1) Cream the butter and sugar until soft and fluffy in with electric mixer, about 3 to 5 minutes.  Add the vanilla.  Stir.  Add the eggs one at a time, mixing well until each is incorporated.

2) In a separate bowl, mix together the flour, baking soda, baking powder, cream of tartar and ground nutmeg.

3) Add the flour mixture and the sour cream alternatively to the egg-butter mixture--start with flour, mix, add sour cream, mix, add flour, etc, etc, until you're ending with flour.  Scrape the bowl occasionally.  

4) Using an ice cream scoop, scoop out a ball of batter and drop it into the sugar/cinnamon mix.  Roll the dough ball around in the mixture until it is completely covered in the yumminess of cinnamon and sugar.  Place the batter into a sprayed muffin tin.  Repeat this until the batter is gone.  You should get between 12-18 muffins.  (Makes a huge mess, but worth it!!  Your finished muffin will have a crispy sugar coating all over and taste so much better than if you just sprinkle the sugar on top of the muffin.  I know, because I tried it both ways.)

5) Bake (at 350F) for 20-22 minutes or until toothpick inserted in center of muffin comes out clean.  Set on wire rack to cool, and then keep in an airtight container until all have been consumed...probably 18 to 24 hours later... best when warm!

Saturday, January 14, 2012

A Math Lesson: Adding to Ten

With the holidays over, we have been back into the swing of things with homeschool.  We did a lesson recently on ways to add up to ten.  My goal is for K to memorize all the math facts that add up to ten.  We'll get there eventually.  The introductory lesson for this was something I made up using ten cars and a homemade "math board".  For the math board, I glued two pieces of yellow cardstock to a bigger piece of cardboard.  I wrote a plus sign in between the yellow papers and an equals ten on the right.  Easy!

At the beginning of the lesson, we counted out ten cars.  Then we took turns placing a random number of cars on each piece of yellow cardstock.  We counted them (ex: 7 cars on the left and 3 cars on the right) and wrote down the "new" way to add to ten (7+3=10).  My son was more interested in driving his cars around, so I had to make up little stories as to where they were going in order to finish the lesson. (These five cars are driving to Costco, and these five cars are going to Red Robin for burgers and fries!)  I didn't think that he was really connecting with it, and was sort of disappointed with the end result.  However, about a week later he was watching a LeapFrog video (Math Adventure to the Moon) and there is a segment where Tad & Lilly find all the ways to add up to ten.  He quickly pointed out, "Hey, they are adding up to ten!"  Cool, he really did get something out of the lesson!  

After the introductory lesson,  I made flash cards and we review them now and then usually at meal times.  Of course, he's figured out the answer is always ten so I threw in a couple that don't equal ten just to make sure he's paying attention.  For our next lesson, I'm planning to make a worksheet with the problems written out like this: 4 + _____= 10.  Then I'll know if he really knows the answer and isn't just saying, "ten" to everything.  Most likely, we'll pull out the goldfish crackers to help as counters for the problems he doesn't know the answers to.  In my experience, kids tend to like math a lot more if there is food involved!  


Wednesday, January 11, 2012

The Next Steps Towards Learning to Read

So, your child knows the ABCs and the sounds that they all make.  Now what?  Start putting together three letters words with a short vowel in the middle.  The curriculum I used with my son focuses on one ending sound per lesson.  I've listed them below so you can see the progression and use it if you want to.  Overall, the strategy is a simple one and it works because it's phonics based.

Lesson 1: -at (bat, cat, mat, sat, etc...)
Lesson 2: -an
Lesson 3: -ap
Lesson 4: -ad
Lesson 5: -am
Lesson 6: -ag
Lesson 7: -ab
Lesson 8: -ig
Lesson 9: -id
Lesson 10: -it
Lesson 11: -ip
Lesson 12: -im
Lesson 13: -in
Lesson 14: -ix
Lesson 15: -ill
Lesson 16: Add -s to the end of words

In my post Reading Readiness Part 2: Phonics, I shared a bunch of activities that you can do to practice the various endings I've listed above.  Also, if you want a good book that will guide you in teaching your child how to read, check out The Ordinary Parent's Guide to Teaching Reading at your local library.  I am not using that book, but have read through it.  It doesn't have fancy graphics, but will give practical guidance.  I chose not to use it because I wanted a workbook driven program that would have glossy pages, nice illustrations, and little to no prep work for me.  (I am definitely a visual learner!)

In our reading program, Hooked on Phonics, there are also sight words that are introduced along the way. They are simple words that show up often in daily reading, so it's a good idea to have your child memorize them.  Some of the sight words can be sounded out with the phonics rules, but others don't play by the rules and it's just easier to memorize them.  (For example, the word "THE" is impossible to sound out.)  You can introduce the sight words two at a time, or three at most.  The goal is to not overwhelm the child with things to memorize since we want them to focus on sounding out words.  I made flashcards for each word and we reviewed them during meal times.

Here are the beginning level sight words:
he
a
the
no
and
has
is
on
she
what
this
they
go
have
do
look


Now I'm Reading! Series
Finally, kids love to be able to use their new reading skills to read a real book.  It's hard to find something they can read immediately after they learn "at" words, but I have a few suggestions for you.  Check out from your local library the Bob Books.  These books are very basic, the illustrations are underwhelming, but the text is perfect for the beginning reader.  My son was not inspired by them, but maybe your child will be.  We had more success with Pig WigWet PetStop Pop, and Quack Shack by Yukiko Kido.  (Warning: Crab Cab has some gross words and pictures ie: snot pot-- so you might want to avoid that book in the series.) The books have eye-catching illustrations, some cut-outs, and one or two words per page.  We really like them and have checked them out several times from the library; I'm thinking of purchasing a few.  The other series that I would highly recommend is called Now I'm Reading! for Beginning Readers by Nora Gaydos, illustrated by BB Sams.  We own the 20 book set called Animal Pals, but I can not find it on Amazon.  They seem to have split it up into two 10 book sets.  Anyway, the books all contain simple short vowel words, with vivid and silly illustrations.  The books start out easy and slowly become more complex as you progress through the series.  The only drawback is that they are more wordy than the other books I've mentioned.  One tactic that works for books like these is to share the reading and you read page one, your child reads page two.  That way you can get through the whole book without your child feeling overwhelmed.
Pig Wig by Yukiko Kido: Perfect for readers who are just beginning to learn how to read.

If you have found some good beginning reader books, please share the titles in the comments.  I am always looking for books for K to read.  Also, you can have your child help you make up stories using the words he or she knows how to read.  We haven't tried that yet, but it sounds like fun.  Sometime in the future I'll share more about our reading program with the next level of word endings and sight words. Until then, let me know how your little readers are doing.  :)

My little reader.  He's pretending to read this book:
Diamond in the Snow by Jonathan Emmett

My pre-reader.  She loves to look at books
and listen while we read to her.
 

Tuesday, January 10, 2012

Recipe: Mike's Chocolate Chip Cookies


Back in November 2010, I promised in my blog post A Sweet Thank You to share a cookie recipe that my husband had created.  Tonight I made those cookies- they are so delicious!  Then I hopped onto the computer to send the recipe to a friend.  After some searching on the computer,  I realized I had never posted it to my blog like I thought I had.  Sorry!  So, here is the long overdue recipe...  


Mike’s Chocolate Chip Cookies
4 oz. cream cheese (softened)
2/3 cup butter (softened)
1 cup sugar
1 cup packed brown sugar
2 eggs
1 tsp. vanilla extract
3 ½ cups all-purpose flour
½ tsp. salt
1 tsp. baking soda
12 oz. semisweet chocolate chips
¾ cup chopped pecans
¾ cup Craisins

Directions:
1.  In a large mixing bowl, cream the butter, cream cheese, and sugars until light and fluffy.  Add eggs, one at a time, beating well after each addition.  Beat in the vanilla.
2.  Combine the flour, salt and baking soda; add to creamed mixture.  Stir in chocolate chips, pecans and Craisins.  Drop by rounded tablespoonfuls onto  ungreased cookie sheets.
3.  Bake at 350 degrees for 14 minutes or until golden brown.  Remove to wire racks to cool.  Yields about 3 ½ dozen cookies.

(They freeze well and can be heated up in the microwave for about ten second or so and they taste almost as good as if you'd just pulled them out of the oven.)

Sunday, January 1, 2012

Teaching the Alphabet to Miss M

Last year I shared some reading readiness tips that I used with my son when he was two.  Now my daughter is a month away from turning two, and she's also on a journey toward learning to read.  Sadly, I have less time to devote to teaching her, but she's still progressing nicely and knows more than 50% of the alphabet.  Here are some of the tools I've used with her that I didn't have when her big brother was two:

·      Our new favorite book: Learn with Humphrey ABC by Sally Hunter.  It's from the UK, but I'm hopeful that you all will be able to find it locally.  The illustrations are just adorable!


·      LeapFrog magnetic alphabet for the fridge (I like these because they are too big for kids to swallow!) I picked up two sets at garage sales last summer for about a dollar or two each.  They came with an attachment that says the name of the letter and it's sound, but it's annoying.  I put that part up and we just enjoy the letters.  
Here are a few suggestions of ways you can use the letters to help you teach your child:
  •  You can display several letters at a time to introduce them rather than overwhelm with all 26.
  • Or just have up the letters that they haven’t learned yet. We did this for a while and I encouraged big brother to teach his little sister the letters whenever they were hanging out in the kitchen.  Not sure how effective it was, but they had fun.
  • Use the letter to attach something to the fridge that starts with that letter.  Right now we have Christmas photos with the letter that corresponds to the family’s last name holding the photo in place.   (That's more of an activity for big brother, but both kids get something out of it.)

·      Melissa & Doug train alphabet puzzle- very cool; it’s 10 feet long!  
·      Foam letters in the bathtub- they stick nicely to the tub sides, but do clutter up the bathroom.
·      LeapFrog laptop.  I'm sorry to say that my daughter learned most of her letters from this.  You can personalize it so the laptop will say the child’s name, sing a song with your child’s name in it, and include brief emails from family members.  (My son also has one, but at age 4 he gets bored with it faster than she does.)  It's perfect for teaching letter names and their sounds.  I got one for each of our kids as a way to keep them busy at the rehearsal for my sister's wedding.  It's a nice item to pull out when I need them to stay busy, but it is a noise making toy so I don't leave it out all of the time.
It also comes  in green and white for boys.


Besides the gadgets, books, etc...we are also singing the ABC song at various times through out the day, and taking the time to point out letters where we see them.  I was impressed a couple of months back when my daughter noticed the contrails of two jets in the sky.  She shouted out, "X!" and pointed up.  Sure enough, there was a perfect X.  My kids are often reminding me that kids are smarter than we think they are!

For my next post, I will share a road map of the kindergarten reading program I used with my son.  It' works!!  Forgive me if it takes a while to get it posted, but I promise to share the strategies so you can use them too.