Wednesday, December 28, 2011

Christmas Gift Review

Thinking back on this year's Christmas...it was interesting to me how some gifts were an immediate hit and others have taken time to connect with.  I thought I'd share a bit about the toys that were an instant hit with the kids.  The common theme with all of them was that they didn't need an adult to help them understand the toy.  It was instantly understandable to them.  


Our gift to K was a new train table. (We bought it at Costco.)  It required a lot of work to put together, about two hours, but worth the effort. He plays with it morning, noon & night!  Last night at 9:30, I found him in his room with a little lamp on happily pushing the trains around the track!


Our gift to M was a Fisher Price (FP) kitchen.  (Ordered on-line from Fisher Price) It was very easy to assemble and has been by far the favorite toy this year.  She also got a FP tea set from her grandparents and that has been well loved also.  We've had lots of tea parties; I love it!!


My sister- Katie- got each of the kids flashlights, and they love them! She bought them at Target, but the photo I "borrowed" from Amazon.  K's is a Lightning McQueen flashlight, and M has Disney princesses on hers.  Need a quick fix to keep the kids content for a while?  Give them each a flashlight!  I've tucked theirs away in the kitchen cupboard for times when they are bored and I need them to play while making a meal.    


Hooded towels and a new doll were also favorites of Miss M. The towel was from Grandma (purchased from Avon), the doll (by North American Bear Company) was from Aunt Kendra (purchased on Amazon).  We have finally found a name for her new doll: Asia!  So sweet.

What toys or gifts have your kids enjoyed this year?  


Thursday, December 15, 2011

Salt Dough Ornaments *Updated*

One of our advent activities was to make Christmas ornaments, but I didn't have a clue what to make them out of.  My friend, Amy, suggested salt dough ornaments- thank you for the idea, Amy!!  The kids had fun and we made a variety of gifts from this project.  Sorry I can't share pictures of the finished products as the ornaments are going to be given to people who sometimes read this blog. **Update** Now that Christmas is over, I've posted a photo of our finished ornament at the bottom of the screen, so scroll down to see it. :)  

On the first day, we made the dough and cut out our shapes.  The kids had a blast working with the dough and making a mess.  While they played, I cut out the real ornaments that we'd give as gifts.  I used cookie cutters to make the shapes.  Some of the cut out shapes I also stamped with a rubber stamp to give the dough an interesting pattern.  I baked our creations and let the kids play with the excess dough.


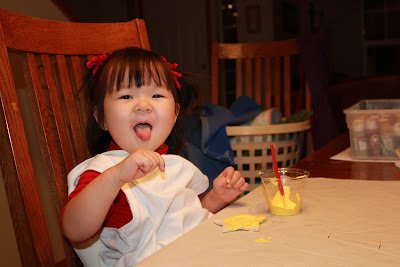
On the second day, we painted the baked ornaments.  The kids love to paint and did a great job.  (Although, Miss M decided to paint her tongue yellow while my back was turned!  Ugh!!  Well, now she knows that paint doesn't taste good.)  Once the paint dried, I added some embellishments to the ornaments.  I discovered that a coat of Mod Podge is a good way to give our little creations a top coat.  While the Mod Podge was still wet, I sprinkled clear glitter on some of the ornaments.  They turned out quite nice.  Once everything was dry, I added ribbon as a finishing touch.   (If you visit Pintrest, just type in a search for salt dough ornaments and you'll find a wonderful variety of ideas to get your creative juices flowing.)


Recipe for Salt Dough Ornaments
(Makes about 12 small handprint ornaments)
Ingredients:
4 cups flour
1 cup salt
1 1/2 cups water
Note: Add more water if needed.
Directions:
Combine ingredients and knead dough for 15 to 20 minutes.
Bake at 300ºF about 20 to 25 minutes or until golden. 
You may have to bake considerably longer depending on how thick your items are. 
They may not feel hard right away but will harden as they cool.
(Ours never did harden even after baking for 40 minutes...guess I added too much water.)

Here's the finished product!  We made ornaments
for Grandpa, Grandma, & Aunt Katie.  I inked
the edges of the star with brown ink, adhered a photo
of the kiddos, and threaded a lovely ribbon through
the hole at the top to make it easy to hang on
the tree.  

Wednesday, December 7, 2011

It's a Wrap!

How are your advent activities going?  It's been so helpful for me to have something pre-planned for each day before Christmas.  It's sort of like a preschool program.  The kids have something new to look forward to each day, and many of the activities are actually helping me to get holiday stuff accomplished.  For example, they helped me wrap their cousin's gifts.  It was entertaining to see them try to figure things out.  K had tons of tape stuck to the paper, but none of it was helping to hold the paper together.  M was having a great time just ripping more and more tape out of the dispenser.  In the end, the gifts got wrapped, and we all had a good time.  


I wanted to share a quick tip too...We had an accident and about ten of our advent numbers tumbled off and the activities inside the muffin tin went everywhere.  Fortunately, I had written each day's activity on a separate calendar so it wasn't too hard to fix the mess.  Having the activities written out also helps me prepare in advance in case there are supplies I might need to purchase.  Sometimes because of unplanned events, we may need to switch the day's activity.  Having it all there at a quick glance, I can look ahead easily switch out the folded papers inside the muffin tins w/o a lot of fuss.

My master Advent Calendar planner, it makes things easy to prep for.