Showing posts with label card making. Show all posts

Monday, January 14, 2013

M&M Valentine Card Idea

Last year I got my craft mojo on and decided to make little Valentine cards for my kids to send to their  friends.  I wanted to post the photos last year, but I didn't want to reveal the surprise before they received the cards in the mail.  So, here are the pictures now...perhaps they will inspire someone to make homemade cards this February.  I used little treat cups from Stampin' Up!  The pink tag at the top pulls out so the M&Ms can be released through a little circle inside the card.   Some clever person came up with the idea, not me.  You can finds TONS of card making inspiration and clever ideas like this one on http://www.splitcoaststampers.com/gallery/  That's my go to source for card ideas, but Pinterest is great too.  Happy crafting!


Friday, January 20, 2012

Handmade Thank You Cards

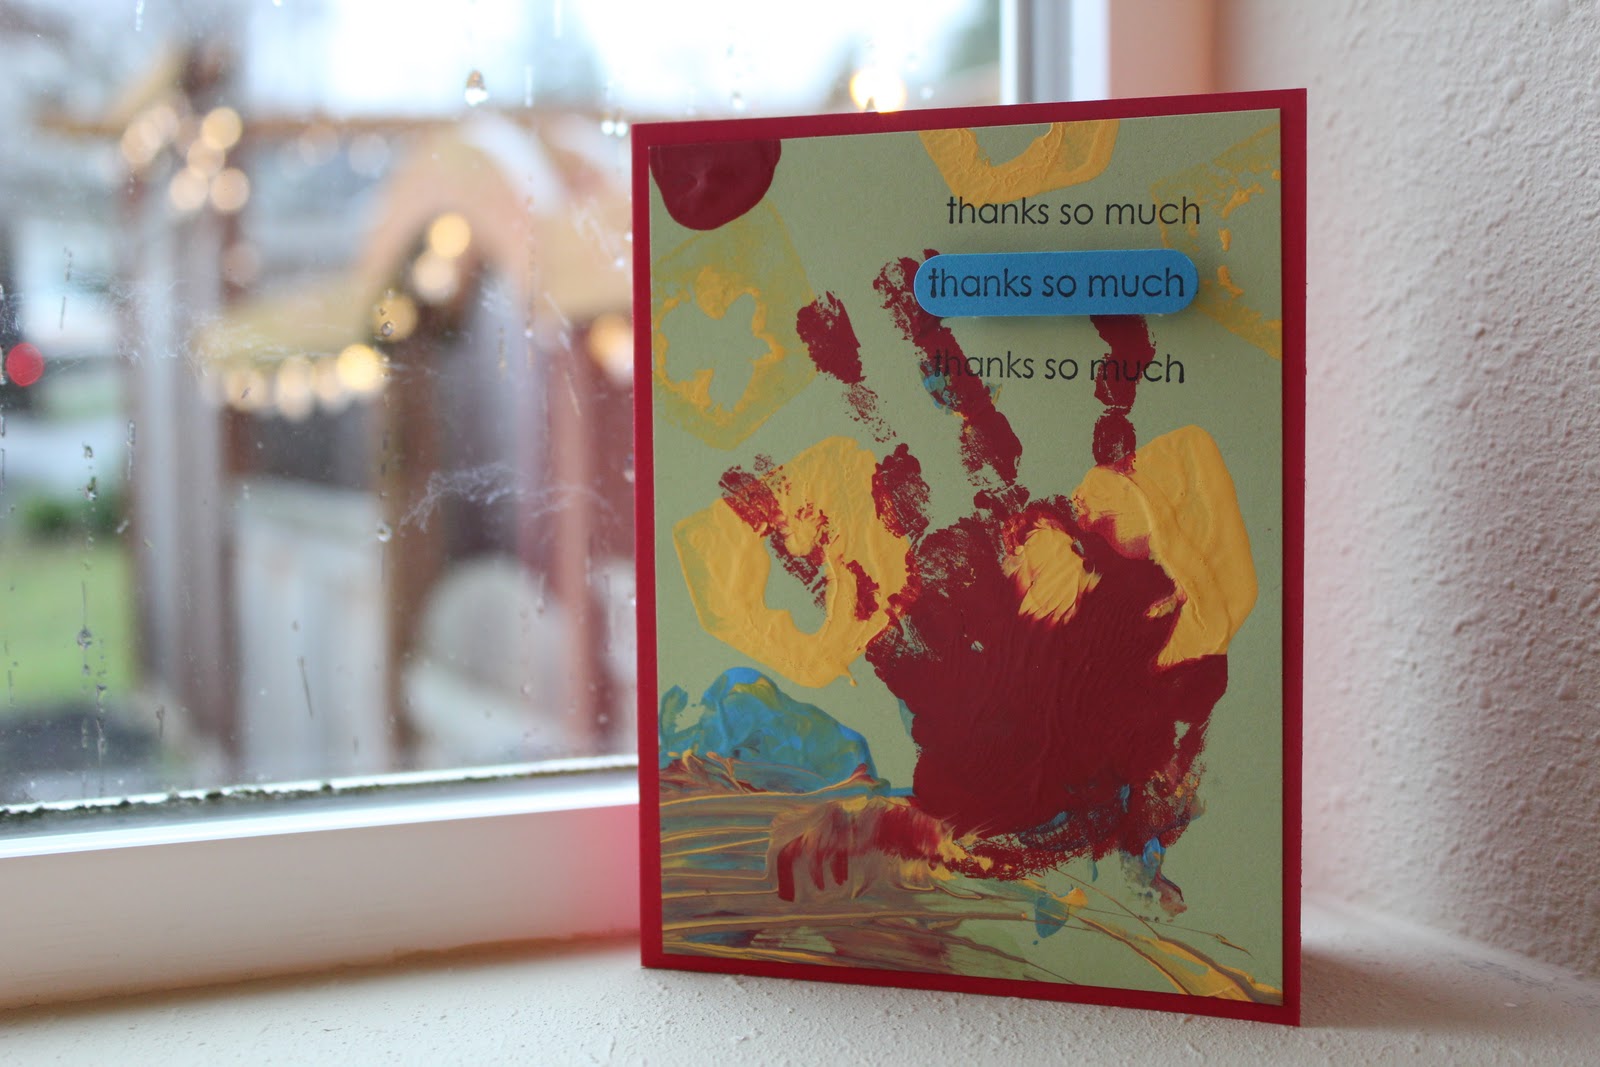
Back in November, I posted about painting with veggies.  We started out using celery, apples, and carrots to put paint to paper, but we ended up finger painting and making painted handprints too.  Messy fun!  Anyway, I tucked away the kids' painted 12x12 papers with thoughts of somehow turning their artwork into a keepsake.  Then December rolled in and we got swept up in advent calendar activities and prepping for Christmas company.  Once life settled down at the end of December, I thought about making thank you cards with the kids so they could thank family and friends for their Christmas gifts.  That's when I remembered the veggie paintings, and an idea for a quick card making craft was born.  


I trimmed the 12x12 pages into 4"x 5 1/4" rectangles.  Then I adhered the painted rectangles with double stick 3-D foam to 4 1/4 x 5 1/2" cards.  To finish the look, I stamped "thanks so much" in black ink.  To give added dimension, I also stamped "thanks so much" to a coordinating colored cardstock and punched it out.  I adhered the punched out phrase with more 3-D foam, and stood back to admire the finished product.  In a short time, I had 12 handmade cards- each one unique.  

When it was time to actually write out the thank you's, I interviewed my son about his gifts and wrote his own words in each card.  Some of his descriptions were hilarious! (Lil sis is too small for much commentary yet.)  I enjoyed getting feedback from the recipients of the hand painted cards.  My sister was inspired by our little project and sent us a thank you card with my niece's handprint on it.  I'm definitely keeping that card!

Friday, October 14, 2011

Craft Idea: Thank You Cards for Brides

 I made thirty of these cards for my sister
to use as wedding shower thank yous.   
After my sister's wedding shower, I realized she had a lot of cards to send out.  Since she was so busy with planning a wedding, working full time, and supporting her fiance as he went through chemo, I wanted to do something to help her.  I love to craft, so making her thank you cards seemed like a fun way to help her out.  I found an adorable card idea on Split Coast Stampers and adjusted it slightly to suit the supplies I had and my sister's wedding colors.  Sorry I don't recall the artist who originally came up with the template, but I love her idea.  Supplies I used from Stampin' Up: Very Vanilla cardstock, paper punch for the flower, grateful stamp, and Rich Razzleberry inkpad and cardstock for both the flower & sentiment.  I also used a Martha Stewart paper punch (for the "lace"), 1/8" ribbon from JoAnn's and a faux pearl to jazz up the flower.  I attached the flower with Zots clear adhesive dots.  The card was actually fairly simple to make.  Hope you give it a try.  The finished card is 4 1/4 x 5 1/2 inches.

Tuesday, October 12, 2010

Introduction to Rubber Stamping

Hi fellow moms.  I thought I'd share a demo of a card I made this past week.  I try to do something crafty every Sunday, although that doesn't always work out.  But this week, I had some fun with a new little stamp set I picked up at the craft store.  I love spending time in my craftroom.  It's a surefire stress reliever for me, plus I end up with something creative that I can give away.


I found this cute stamp set for $1.00 (regular price) at Jo-Ann Fabrics.
Don't let the $1 stamp set fool you, stamping is not a cheap hobby!
Here are some of the supplies I used for this project.  I also used a
paper cutter, glue stick, ribbon, and scissors.

First: adhere your clear stamp to an acrylic block & stamp the puppy.
Then stamp your sentiment with a different color.
Clear stamps make it easy to get the words in the right spot every time.

Then color in your image.  I used a watercolor technique with
a waterbrush and two brown stamp pads, one lighter than the other.
Use the brush to pick up the color from the stamp pad.
Make one side of your image slightly darker for a shading effect.

Now stamp your background paper for extra visual interest.
All the card stock I used is from Stampin' Up.  Love their products!

Add ribbon for extra pizzaz.  I got this twill ribbon at Wal-mart.
Adhere the red square and white square with 3-D adhesive like
3M foam tape.  Then your image really pops!
The finished card is 4 1/4 x 4 1/4 inches.  


Friday, September 3, 2010

Easy Thank You Card


 School is back in session and for some reason that makes me feel like making crafts.  So, I decided to post an easy project idea today.  K helped me make thank you cards before Christmas last year.   It was fun to send a handmade thanks to family from K.  He loved being involved in a craft project and getting his hand painted.  I sponged white acrylic craft paint onto his hand and had wet wipes nearby so we didn't make a huge mess afterwards. (Note: I did not let go of his wrist the entire time or else we would have had paint everywhere!) The sentiment is stamped with StazOn jet black ink.  The stamp set is called Doodle Alphabet from Stampin Up!, and the cardstock is also from Stampin Up!.